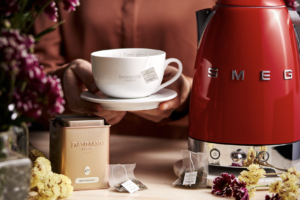
Do you sometimes feel that your images look flat or they miss something? It happened to me often when I was at the beginning of my food photography journey. The images somehow missed the depth, they were flat. Depth can be achieved with lighting, camera settings, or via composition. There are many ways. Today, I will show you 5 simple but effective ways how you can add depth to your food photos.
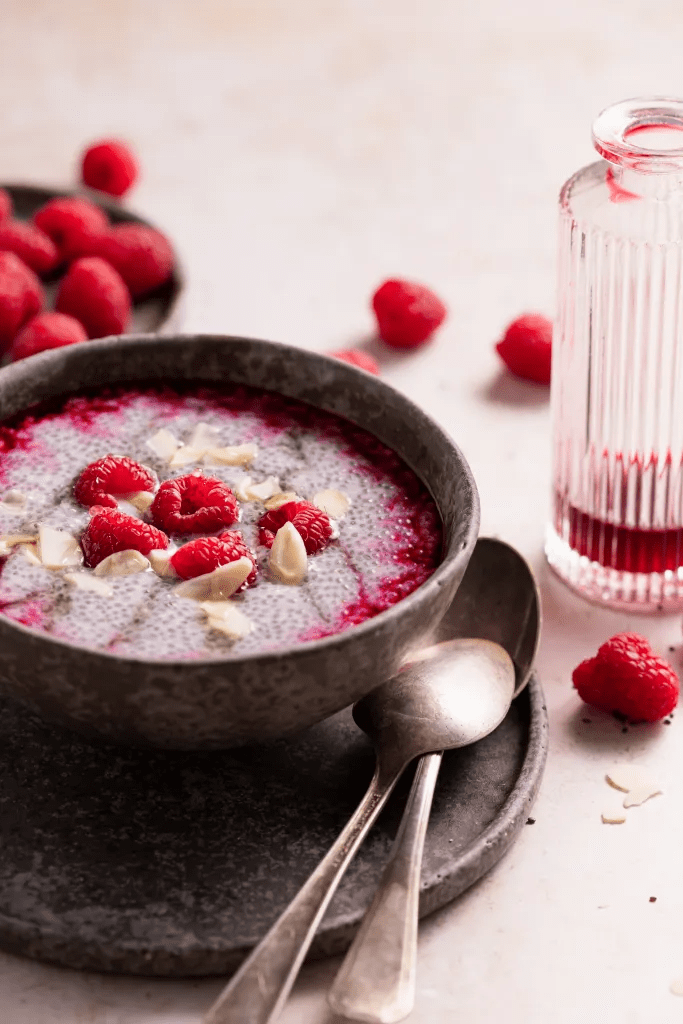
tip #1 - move your scene closer to the light source to get more dramatic feel
The intensity of light decreases with the distance from its source and this is called falloff. Falloff happens with natural or artificial light, and you can use it to create different moods in your images.
The image you see below was shot with natural light. When I move my scene closer to the light source, which in my case is the window, the intensity of light will increase, but at the same time the falloff gets more sudden. Light decreases dramatically within the first meter from the light source, and this makes a greater tonal contrast between the highlighted area and shadows.
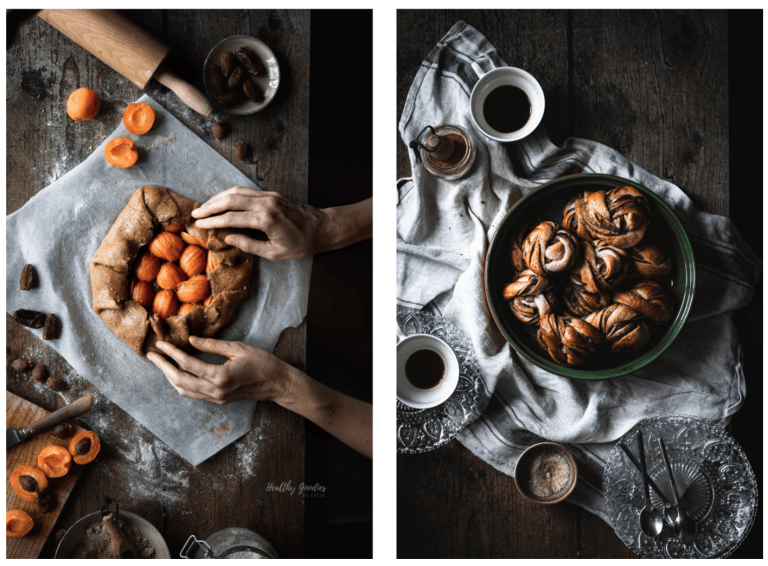
That results into shadows, that are richer and this adds the depth to the image.
Light can make your image magical. Without the right lighting, the photo doesn’t work. If you want to learn more about lighting, we have many resources inside our Member's Club. You will find a few masterclasses about working with natural and artificial light, a course: Principles of Lighting in Food photography.

Grab my freebies and improve your skills
Join my VIP e-Library and get access to all my freebies and live training replays to help grow your food photography skills.
tip #2 - or use black cards to make shadows richer
This is another very simple way for adding depth to your image. All you need are some black cards. It can be anything - a black sheet, black foam card, black paper or a reflector with a black cover. Anything that has a black colour.
If you feel your image looks flat, try to position the black cards around the scene. This makes the shadows richer and stronger, and adds the mood to the image too.

Tip for beginners:
Next time you photograph, capture an image without black cards, and then another one using the black cards. Then, you can compare these shots and study them closer. Notice how the shadows behave. Which one do you prefer more? This is also something that defines your personal photography style.
On the other side, you can use black cards to position to the background of your scene, that makes the background dark and mysterious. This is something you can try for creating dark and moody image. When you block the light on the side of the scene as well, it will make that smooth transition from the bright to dark part.
tip #3 - play with a shallow depth of field
In photography, there is a deeper depth of field and a shallow depth of field. Deeper depth of field makes more objects in focus.
Shallow depth of field makes that magical capture - where the foreground and background is blurred, while the main hero if in focus. There is no right or wrong choice here, it depends on what you want to express in your image.
The shallow depth of field doesn't depends only on the aperture (f-stop number). To create deeper or shallow depth of field depends on various factors together. The first of them is the f-stop number. The lower the f-stop number, the shallower depth of field you will achieve. And vice versa.
Another factor is the distance of the lens from the scene, and the focal length of the lens too. The closer you position your lens to the scene, the shallow depth of field you will achieve. And, the higher focal length lens you use, the shallower depth of field you will get.
I often shoot flat lays with an f-stop number 5 or 4, or even less, while having more objects in focus. It’s because, I keep a larger distance from the scene. On the other side, you can work with the f-stop number 8 or more, shoot from too close and you get a very shallow depth of field.
So, the next time, try to play with a shallow depth of field, which adds more depth to the images.
tip #4 - include objects of different heights
Working with various levels or we call them layers too adds lots of depth to your images as well. This applies also for flat lays. You can work with various height of the objects, such as wine bottles, glasses, plates, or bowls. When taking a photo, your focus is on the main subject. But because of different heights, and because of a shallower depth of field, some objects become blurred. This adds the interest, depth and makes the shot just magical.
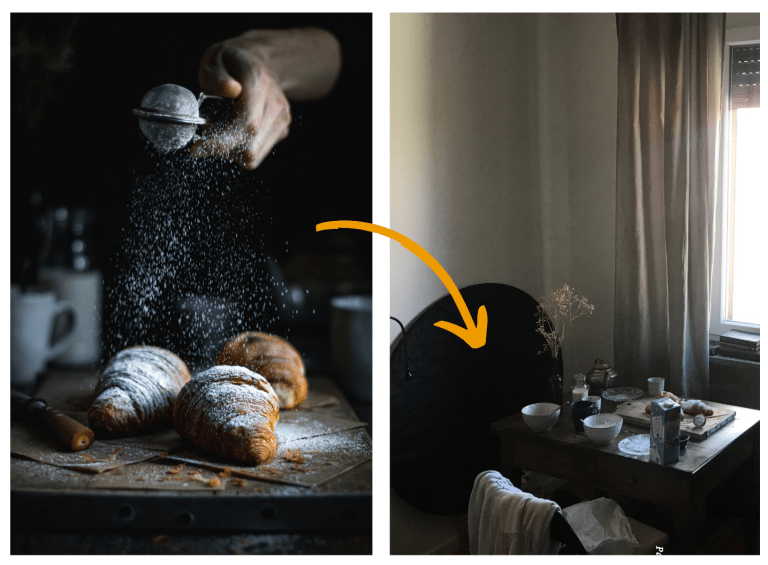
You can also add various levels below the scene, such as chair or floor, as you see in these images.
Shooting a larger scene, Including floor or chair into your scene, will require to shoot from a bigger distance. Have a look at this blog post, where I talk about the equipment I use in food photography.

On the left, I work with similar heights, and the image feels flat. On the right, I included more objects of different heights in the image and played with more levels - flowers, chair, and floor. The image has more depth and feels more dynamic and interesting.
tip #5 - focus on tonal contrast when editing the image
The other way to add depth is through tonal contrast. Focus on creating enough tonal contrast when editing the image. Tonal contrast is very important. It adds the depth to your food photos and helps the main hero stand out.
Tonal contrast is the contrast between the brightest and darkest areas in an image. You achieve it by adjusting tones, such as highglights, and shadows, whites, and black. There are other ways how to adjust tonal contrast and this is also what I teach inside my Members' Club - in a course about Editing in Lightroom
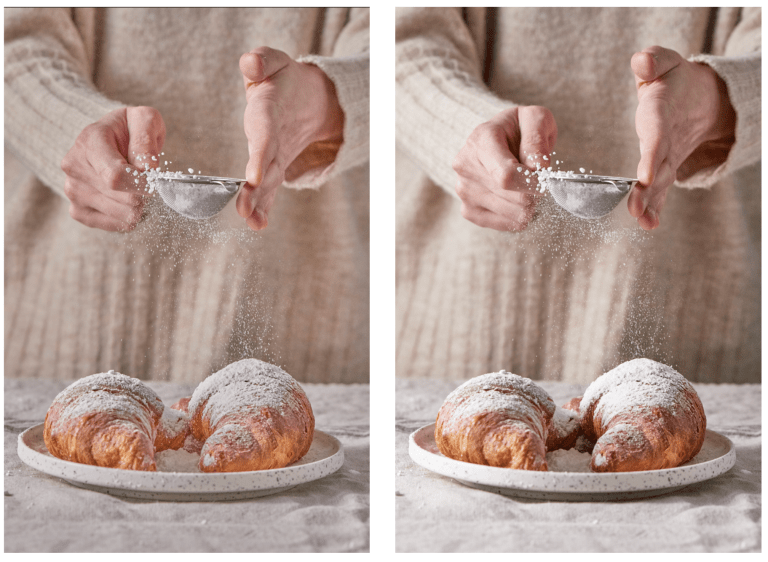
On the left, notice the low tonal contrast which makes this shot look flat. On the right, the tonal contrast is much stronger, and it adds the depth and interest to the image.
Conclusion: 5 simple ways how to add depth to your food photos
Adding depth to your food photos can be easy, and there are a few ways to do it. Let's sum up what we have learned today:
- use falloff to create a more dramatic look in your images
- position black cards around your scene to make the shadows richer
- play with a shallow depth of field by moving your camera closer to the scene, adjusting the f-stop number and having the right focal length of the lens
- include various heights of objects in your scene
- focus on tonal contrast when editing your images
Thank you for reading!
Thank you for stopping by!
If you want to dive into food photography, and take your skills to the next level, I invite you to join our Members’ Club. We have food photography courses, masterclasses, an amazing community of other like minded creatives. This is the environment that will inspire you, motivate you and help you progress more and faster towards your goal.
Let me know about your gear in the comment s or on Instagram! You will find me as @healthygoodiesbylucia. I am excited to hear from you!
Pin for later
Join me for free 50tips series and grab your freebies!
Join my 50tips series - 1 food photo tip every Friday. After you join me, you will receive freebies to your mailbox - A guide: How to work with natural light in food photography and others!
Hi there! I'm Lucia Award Winning Food Photographer, Teacher, Business Coach, and, Founder of FOODlight. I am passionate about food photography, online business, sharing my knowledge & building a community of amazing like-minded creatives, such as yourself, that inspire and support each other. Feel free to reach out to me via my email lucia@foodlight.io or via Instagram, I'll be happy to connect with you!
